Zombie nails are one of the most striking Halloween manicure themes you can wear. They combine horror, creativity, and bold style in a way that few nail trends do. Whether you want dramatic gore or subtle undead flair, this guide will help you understand what zombie nails are, how to make them, and how to customize them for everyday wear.
What Are Zombie Nails?
Zombie nails are nail art designs inspired by undead, post-apocalyptic, and horror themes. They often use colors and textures that mimic decay, rot, blood, and eerie textures — think murky greens, muddy browns, grays, deep reds, and vein-like crackle effects.
Unlike classic manicures, zombie nails lean into creepy and expressive storytelling right on your fingertips. For some people, that means haunted scenes; for others, it’s grunge textures or cartoonish brain art.
Why Zombie Nails Are Trending in the USA
Zombie nails are popular for several reasons:
- Halloween and spooky season: Perfect for October events and costume parties.
- Creative expression: Lets you push beyond classic nail art into thematic storytelling.
- Social media appeal: Bold and unique designs get shared widely on TikTok and Instagram.
- Versatility: You can go full gore or subtle chic depending on the occasion and preference.
Common Styles & Visual Ideas
Here are the core styles you’ll see — with descriptions you can recreate:
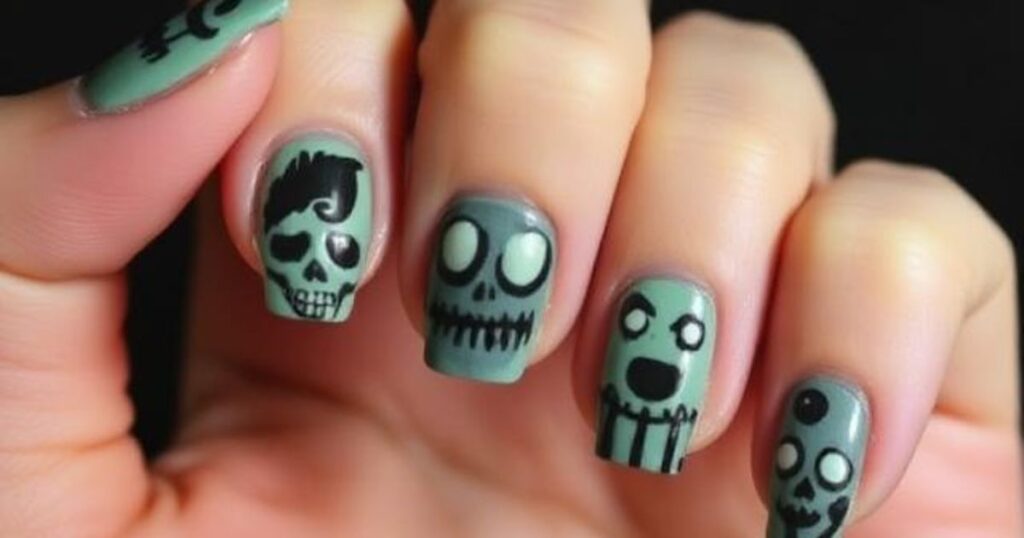
1. Decay and Rot Textures
Colors: olive green, gray, charcoal.
Effect: cracked lines or marbling that looks like decomposed flesh.
Example: gray marble with thin white veining that resembles broken stone.
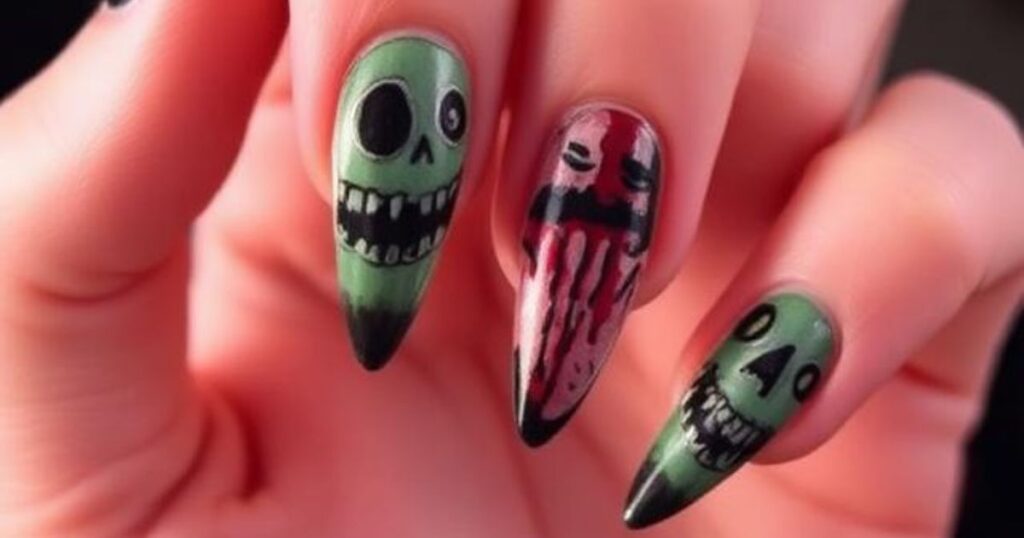
2. Blood Drip & Splatter
Colors: deep red over a neutral or dark base.
Effect: blood streaks dripping down the nail for dramatic horror flair.
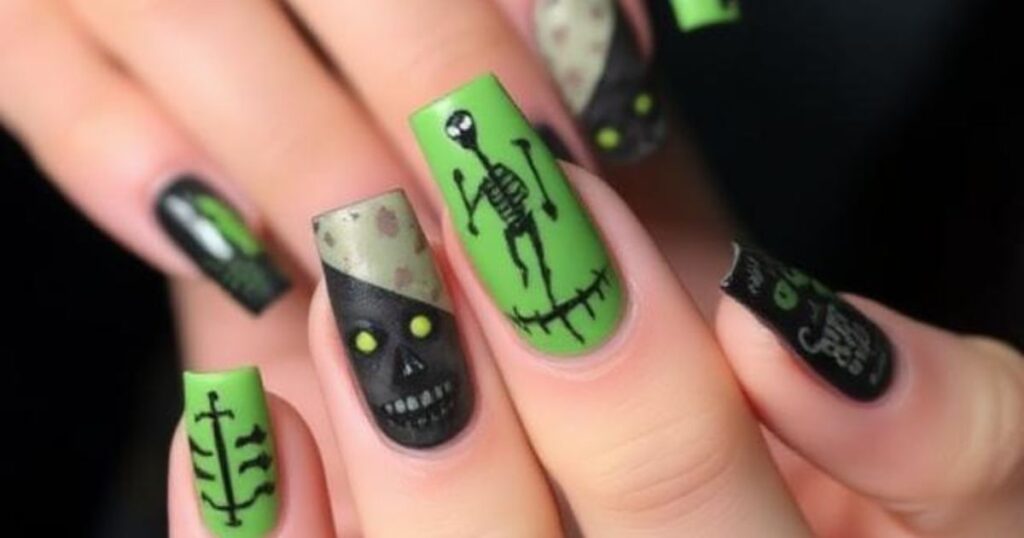
3. Zombie Brain & 3D Effects
Designs featuring tiny painted brains, eyeballs, or flesh textures — often hand-painted or added as decals.
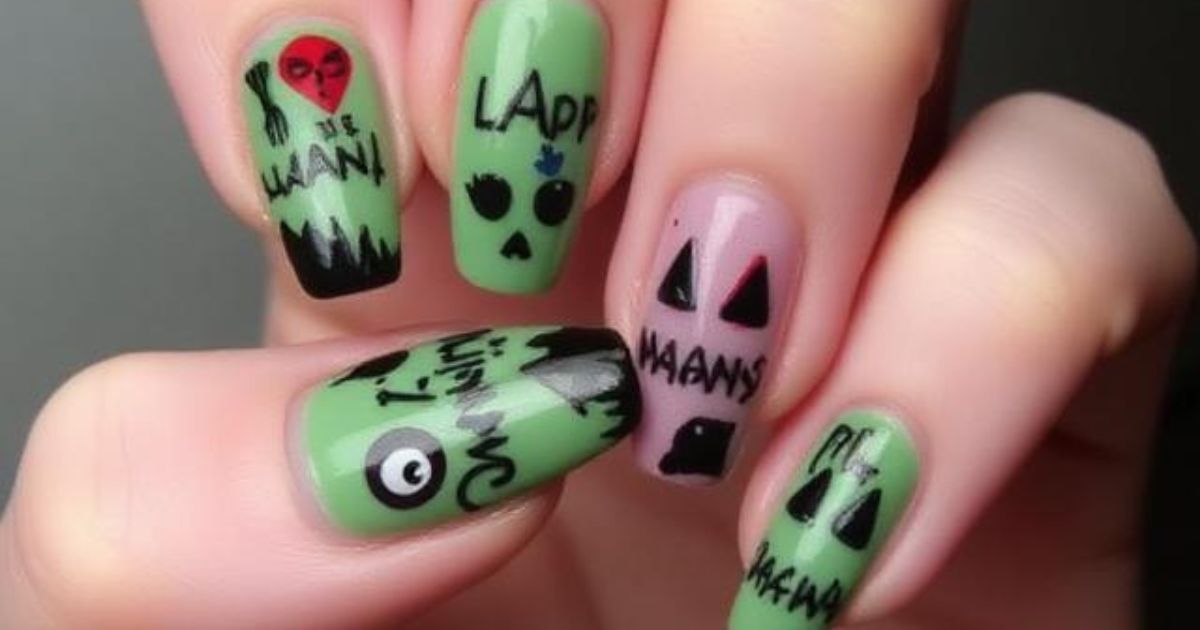
4. Creepy Cartoon & Graphic
Cartoon zombies, spooky scenes, hands reaching out — fun but spooky nail art.
5. Subtle Undead – Wearable Version
Muted greens, grays, cracks, and “ghostly” shimmer that’s eerie without being overtly gory.
How to Make Zombie Nails (DIY Guide)
You don’t need a salon to try this nail style — here’s a simple at-home method:
Materials You’ll Need
- Base coat and top coat
- Nail polish (greens, grays, reds, blacks)
- Thin nail art brush or dotting tool
- Sponges or toothpicks for texture
Step‑by‑Step (Simple)
- Prep nails: Clean, shape, and apply base coat.
- Paint base color: Use green, gray, or neutral tones.
- Add texture: Dab a sponge with darker tones lightly to create a mottled effect.
- Detailing: Use a thin brush for drips, cracks, or accent art like eyeballs.
- Finish: Seal with top coat.
For a fun alternative, use stamping plates designed with zombie nail art — they make detailed patterns easy to apply.
Tips to Make Them Look Professional
✔ Balance dramatic with wearable: Limit 3D motifs to a few accent nails so your manicure doesn’t get too wild.
✔ Use gel polish: Helps extend life and make designs pop.
✔ Practice layering: Build up textures gradually for more realistic effects.
✔ Protect your nails: If you use acrylic, keep cuticles healthy with nail oil.
When Zombie Nails Can Be Wearable
Not everyone wants scary nails all the time. You can tone down zombie nails by:
- Using muted color palettes
- Skipping gore details
- Using subtle cracks or ghostly fog effects instead of blood or brains
This makes them suitable for fall fashion, concerts, or everyday outfits while still reflecting your style.
What Competitors Miss (and What You Get Here)
Many sites just show images or a “50+ designs” list without real guidance. This article gives you:
✅ Clear definitions
✅ What materials do you need
✅ Step-by-step DIY tips
✅ Wearability and style advice
✅ Practical color and tool suggestions
Conclusion
Zombie nails are more than just a Halloween trend — they’re a bold way to express creativity and horror style through nail art. Whether you want subtle undead vibes or full gore glam, there’s a zombie nail design for you. Experiment with colors, textures, and tools to make the look your own!
FAQs — Quick Answers
Q: What colors work best for zombie nails?
A: Greens, grays, deep reds, black, and muted earth tones give the most undead vibes.
Q: Can I wear zombie nails beyond Halloween?
A: Yes — choose subtle designs with muted tones or simple cracked textures.
Q: Are zombie nail designs hard to do at home?
A: Not if you follow step‑by-step layering and use tools like sponges and thin brushes.
Q: Should I use gel or regular polish?
A: Gel polish lasts longer and shines brighter, but regular polish is fine for short-term fun.
Q: Can zombie nails damage natural nails?
A: Only if acrylic or harsh removal is used incorrectly — always protect your nail beds and moisturize after removal.